I wasn’t originally going to do anything about Jam making on my blog, as Jam is dairy and soya free anyway. However, with the autumn coming in and there being an abundance of fruit about its been pretty much all I’ve been doing for the past few weeks, and the flavour of homemade Jam is more than worth the effort.
It all started with a visit to my father in laws allotment with the kids. Between the hiding in the treehouse, and downright dangerous wheelbarrow rides (yes, they did survive a couple of tumbles) the whole allotment had been covered in fruit from two large Damson trees left by the previous owners. Now my father in law was all for cutting the trees down. Too much mess apparently! But after rescuing 4 kilos of damsons, jamming them and giving him back the produce, the Damson trees have been saved!
So this article is going to focus on the Damson Jam I made, although I make Jam using this method whatever the fruit so don’t be put off, just substitute for any fruit you like.
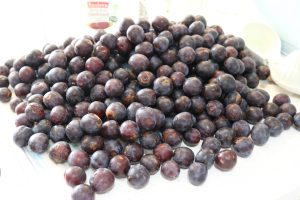
Now Damsons are a very unusual fruit so you probably wont find many recipes out there. They are like a very small plum, but a little tarter tasting. The Jam they make is like nothing else. It is sweet and dark purple, but with a bit of a tangy bite that makes it perfect for cutting through the sweetness of some cakes and biscuits. Its also a personal favourite of mine as my Gran had a Damson tree in her garden when I was little and I have very fond memories of her making Damson Jam. I could smell it wafting from the kitchen as I was playing outside, and getting to eat it on freshly made scones when she had finished was such a treat.
Ingredients:
1kg Damsons ( or any other soft fruit like raspberries, strawberries, plums, apricots or brambles)
1kg Granulated sugar
Juice of 1 lemon
Yes that’s it! No pectin, no complications, easy peasy Jam!
Method:
Wash and weigh the fruit. Don’t bother with stoning or skinning the fruit but if its large like plums and apricots then cut into smaller chunks. Obviously top strawberries. The reason we leave the stones in is they are a natural source of pectin so help the jam to set. I have an easy method to remove them later. With the Damsons I just washed them and put them in the pot.
Put in a large pot and cover the fruit with an equal weight of sugar. If you have time you can leave the fruit like this overnight. This is particularly good for strawberries as it breaks the fruit down and draws out the juices, giving you a smoother Jam at the end. It is not essential though and I missed this step out with the Damsons as I was trying to get all 4 kilos made in one day and simply didn’t have enough pans!
Add the juice of 1 lemon. Lemon is another source of natural pectin and just helps the Jam to set without using anything artificial.
Slowly heat the Fruit, sugar and lemon juice over a low heat. If you heat to quickly you risk catching the sugar and caramelising. You want to heat slowly until you get a smooth juice and all the sugar is dissolved.
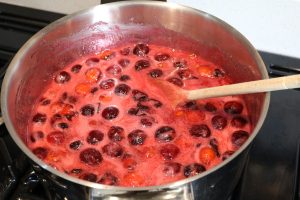
Now put the heat right up till the mixture starts to fast boil. This is where the mixture is violently bubbling and you may even get a foam appearing on the top. Once we have a fast boil the mixture should be the right temperature for Jam making, but you can use a thermometer to check the temperature if you wish. Its not essential.
Meanwhile, put the Jars you are going to use into the oven at about 80-100°C to sterilise them, ready for the Jam.
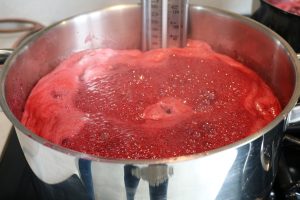
You will need to fast boil for at least 10 mins. Different fruits take different amount of time and the only real way of testing whether a Jam is ready is to use the plate test.
Put a plate in the fridge so it is cold. After 10 mins of fast boiling, put about a tsp of Jam mixture onto the plate and return to the fridge for two minutes. Continue boiling the Jam as you do this.
After 2 mins, take the plate out of the fridge and put your finger in the Jam. If the Jam is runny, its not ready and do the test again. Repeat every 2 mins. When the Jam is ready you will see the jam wrinkles as you press your finger through it, like it is beginning to set on the top.
Remove the Jam from the heat at this point. My Damson Jam took 15 mins of fast boiling to get to this stage. Strawberry and Raspberry are the ones I find take the least amount of time so be vigilant.
If you are making a strawberry Jam or seeded raspberry or bramble you can simply skip the next stage and go straight to putting in jars.
Now we need to remove the skins and stones. This method also works for brambles and raspberries if you want a seedless jam.
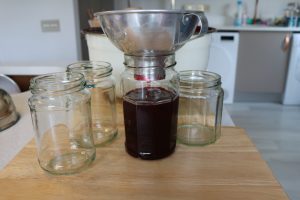
Put a sieve over a large bowl. Make sure the holes in your sieve aren’t too small. Pour about a ladle or two of the Jam mixture into the sieve in use a wooden spoon to stir it through so all you are left with is skin and stones.
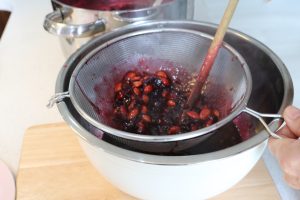
Make sure you get the juice from the underside of the sieve into the bowl, then empty out the skin and stones and repeat until you have sieved all the Jam. I find this method the easiest way to ensure you get no skins and stones in the final product. Don’t use muslin as you will end up with a Jelly, not a Jam.
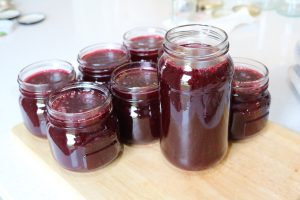
Now, take your warm Jars out of the oven and pour the jam in. This is easiest with a ladle and funnel. Place a wax circle on the surface of the jam and allow to cool completely.
Pop on a lid and a label and store in a cool, dry place. I like to use my Jam within a year of making it.
Occasionally when your Jam has cooled you will realise it is either a little too runny or too well set. Don’t panic and don’t throw out your hard work. If its too runny you can simply boil it up again and thicken it. If its too thick you can add some boiled water just before you are going to use your Jam. Stir it in and your Jam will become a more manageable consistency. Or you can warm it to soften it in the microwave and use it for things like empire biscuits. When the Jam resets hard again it will hold the biscuits together perfectly.